I've really enjoyed this summer. Between vacation, helping my sister move, and spending time with family I've barely been home long enough to even start on my summer to-do list. What little time I have been home seems to have been taken up with the never-ending project that I decided was necessary.
I need to totally reconfigure my classroom this year, and I needed a shelf much deeper than a bookshelf to hold graded papers and make-up work for students who have been absent. Unfortunately shelving deep enough to fit my needs wasn't going to be found in the "random extra furniture" location on campus so off to the thrift stores I went. I walked in thinking "I have no idea what I need, but I'll know it when I see it." I had no luck at the first two places, but luckily the third place I walked in had exactly what I was looking for. After calling a friend to make sure I wasn't any crazier than normal (and to talk her into helping me transport my find since it wasn't going to fit into my car -I measured) I paid $30 for a cabinet that, while a little worse for the wear, was exactly the size I needed.
After taking off the doors, taking out the drawers, adding in a plywood shelf where the drawers were, and a coat of "pool" chalk paint this was the result.
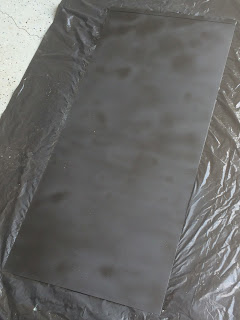
Of course then I decided that I couldn't waste the doors so I got the grand idea to turn them into mini-chalkboards. I googled "magnetic chalkboard paint" and the first two blogs I pulled up said it doesn't work. The chemicals in the chalkboard paint counteract the magnetizing properties of the magnetic paint. Basically you can do one or the other, but if you try to do both it doesn't work. So much for my grand idea. Thank goodness one of them gave an alternative. Buy a cheap piece of sheet metal and spray paint it with chalkboard paint. Brilliant. Sheet metal is relatively cheap and I didn't need a lot so I decided to go for it.
 |
| Doors from the original cabinet chalk painted in "celery". |
 |
| Sheet metal spray painted with chalkboard paint. |
 |
| Magnetic Mini Chalkboard |
The final product turned out great. I now have two magnetic mini chalkboards. One will hold no-name papers (you would think that Sophomores would have learned to write their name on their work but apparently that's not the case) and the other will go over the cabinet with directions on claiming graded work and getting make up work.
With the help of the same friend who helped me transport the cabinet to my garage for its make-over I was able to get it all into my classroom. The final product was EXACTLY what I needed.
 |
| Finished shelving |
There are 3 orange crates that will house all graded work. Each student will have a folder with his/her name on it. As work is graded it gets filed in these folders. It is the students' responsibility to pick up their own work. I tried this last year with half of my classes and it worked great. No more wasting time in class passing back work and no more papers left on my floor from kids who didn't want their work. Perfect! It takes a little bit of time to file the papers, but once you get a system it's not bad at all.
The purple crates (and there will be 3 of them also) will house any handouts/notes/work that needs to be claimed by absent students and the binders above the purple crates have details about exactly what was done in class each day so students know exactly what to look for and what they should turn in.
I've finally admitted that summer is almost over (I got my pre-planning agenda in the mail today so it's official) and I need to get back to work. My classroom is almost done, there are just a few finishing touches that I need to add and it will be ready. Maybe during pre-planning I'll actually get to do some planning.
Here are a few pics of my classroom in its current state. I love the cubicles. They house all my markers, colored pencils, rulers, and classroom supplies. They are easy to access but not visible. Not cheap, but definitely worth it in my opinion. The pink basket on top of the shelf holds tape, a hole punch, and a stapler. These are the things the students are allowed to use. If it's on my desk DON'T TOUCH IT. The blue baskets to the left of the pink one are my turn in baskets. There is one for each class period and that is the ONLY place that work gets turned in I've had these baskets about 5 years and they are worth 10 times their weight in gold.
Yes, my desk and the table in front of it are covered in contact paper and edged with turquoise duct tape. When the top of your desk and table start peeling off you get creative.
This is the back of the room, and no the desks aren't arranged yet. The closet in the back is the only storage built into the classroom, hence the cubicles on the other side of the room that I use to store supplies. In the back by the closet was the best location I could find for my new shelving. It's well inside the room so students getting their work should not cause a traffic jam at the door, it's away from my desk so I won't have students crowding around my desk looking for things, and it's not taking up space I would be using for desks anyway. Hopefully it will work well. I guess we will see in about two weeks.


